Selecting a scan target
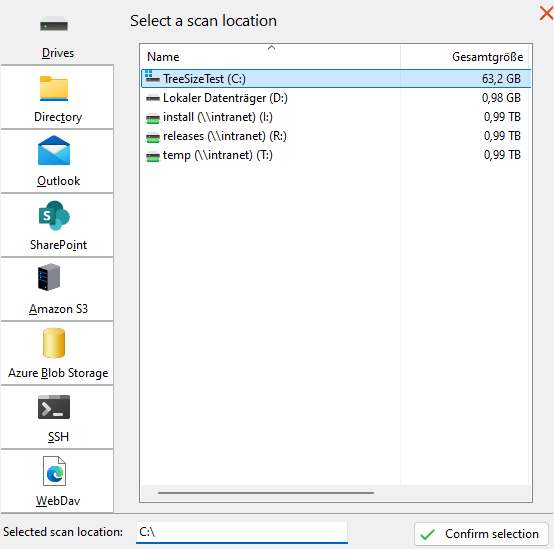
You can use this dialog to configure scan destinations. Even complex paths and URLs can be put together with just a few clicks.

All available scan targets are listed on the left-hand side of the dialog.
To the right, the directory to be scanned in the currently selected scan target can be specified and, in the case of cloud/remote targets, the access data for the connection can also be entered there.
The currently selected path is displayed in the input field at the bottom of the dialog. Paths (or URLs) can also be entered in this field to select the path to be analyzed as quickly as possible.
Click on the button next to it to start the scan.
Available scan targets
You can select one of the supported scan types on the left-hand side of the dialog to start configuring a more complex scan target:
Drives & directory
For these two scan targets, the corresponding drive or directory can be selected in the list or in the directory tree. Double-click on a drive or folder to start the scan immediately.
Outlook
Scan one or more Outlook mailboxes.
Mailbox
Here you can select the mailbox to be analyzed.
Subpath (optional)
A path or folder within the mailbox can be selected for the scan here. This means that the entire mailbox is not scanned, but only the corresponding subpath.
Google Drive
In this area, you can:
Sign in to your Google account when not logged in already
Choose if you would like to stay logged in
Log out of your Google account
Additionally, it is possibly to choose the scanned path at the bottom in the dialog’s “Selected path:” input field:
Use
gdrive://orgdrive://*as path if you would like to scan your entire storage (excluding files that are exclusively available in “Google Photos” and which do not show up in the regular Google Drive).Use
gdrive://<subpath>/<optional folder>to scan a specific subpath on your Google Drive.It is also possible to scan a specific folder by pasting its URL from your browser into TreeSize.
Amazon S3
Scan of an Amazon S3 bucket.
Bucket name
The name of the Amazon S3 bucket you want to scan.
Prefix (optional)
The prefix on the respective bucket that is to be analyzed. For example, if there is a folder called “folder” and another folder called “subfolder” exists in this folder and the latter is to be analyzed, you would use the prefix “folder/subfolder”.
Access key
The access-token of the user to perform the scan as.
Secret access key
The secret access-token that fits to the used access key.
Azure Blob Storage
Scan of an Azure Blob Storage container.
Container name
The name of the container to be analyzed.
Virtual directory prefix (optional)
Analogous to the prefix for Amazon S3.
Storage account name
A type of user name that is used to connect to the selected container.
Access key
A kind of password for the connection to the selected container.
SSH
Scan of a Linux or Unix file system using SSH.
Server name
Analogous to the server name for SharePoint.
Path (optional)
Analogous to the path for SharePoint.
User name
User name for authentication on the selected server.
Password
Password for authentication on the selected server.
WebDav
Scan a target via the WebDav protocol.
Server name
Analogous to the server name for SharePoint.
Path (optional)
Analogous to the path for SharePoint.