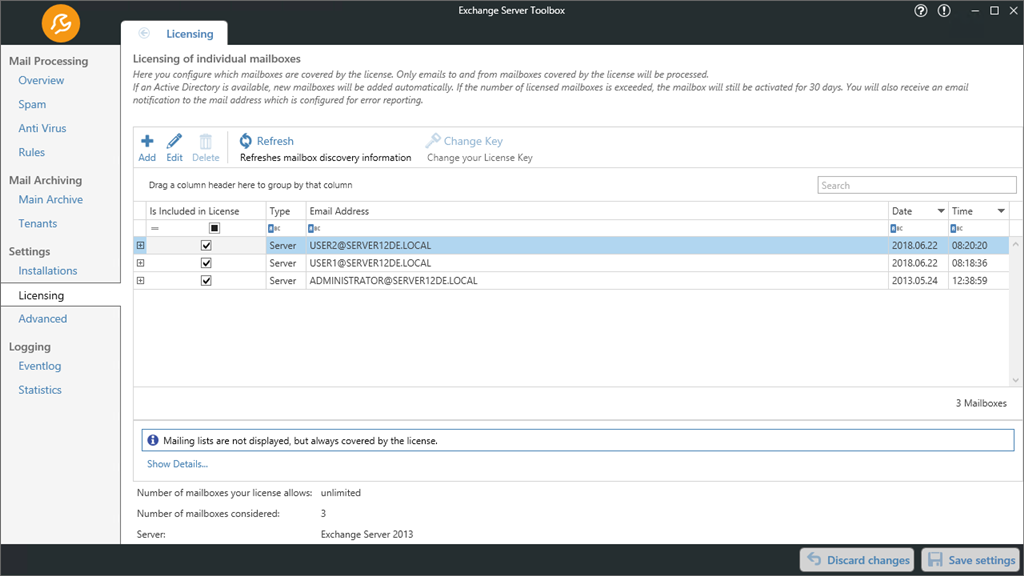
The Exchange Server Toolbox can manage as many mailboxes as your license allows. Here you can set which of your mailboxes should be processed by the Exchange Server Toolbox. All other mailboxes will be ignored.
If the number of licensed mailboxes is exceeded, the surplus mailboxes are temporarily activated for 30 days. In addition, an email will be sent to the error notification address that you can configure under Settings | Advanced | Mail delivery.
Toolbar
•Add: Add new mailbox
•Bulk-Import: Import a file with many email addresses separated by commas, semicolons, spaces or line breaks
•Edit: Edit selected mailbox
•Delete: Delete selected mailbox
•Refresh: Refresh the list of mailboxes
•Change Key: Change the license key of the Exchange Server Toolbox
Column functions
Right-click on one of the columns to open a menu.
•Sort ascending/descending: The entries are sorted by the column ascending/descending
•Clear Sorting: Removes the ascending/descending sort order. Only usable on columns that are currently being sorted
•Group By This Column: Groups the entries by the selected column
•Show Group Panel: Opens the group panel above the columns
•Show Column Chooser: Shows the column chooser. Here you can select and deselect columns for display
•Best Fit: Adjusts the width of the column so that the longest entry is fully visible
•Best Fit (all columns): Adjusts the width of all columns so that the longest entry is completely visible
•Filter Editor: Opens the Filter Editor, which contains extensive options for creating and customizing filters
Grouping of columns
The table can be grouped by selected columns using the "Group by this column" function. Once you have displayed the grouping field, you can drag the column headers into it to group by them. You can also change the order of the grouping by dragging and dropping in the grouping field.
With a right click on the grouping field, you can expand, collapse and remove all groupings.
A right-click on one of the groupings opens a menu.
•Full Expand/Collapse: The selected grouping is expanded/collapsed
•Sort Ascending/Descending: The selected grouping is sorted in ascending/descending order
•Clear Sorting: Removes the ascending/descending sort order. Only usable if sorting is currently done according to the grouping
•Sorting By Summary: After setting up a group summary, the groups can be sorted in ascending/descending order here
•Ungroup: Removes the selected group
•Hide Group Panel: Closes the group panel
•Show Column Chooser: Shows the column chooser. Here you can select and deselect columns for display
•Best Fit (all columns): Adjusts the width of all columns so that the longest entry is completely visible
•Group Summary Editor: Here you can define factors by which each group is sorted. For example, if you select "Spam Score" and "Max", the largest spam value of all elements in the group is selected for each group. Now the groups can be sorted by this value
•Filter Editor: Opens the Filter Editor, which contains extensive options for creating and customizing filters