If a SharePoint Online site is configured to require a multi-factor authentication, SpaceObServer will perform a browser based authentication (as known from other Azure AD apps). To identify itself to the authentication service, SpaceObServer uses the certificate login method. For this purpose a self-signed certificate is required. Instructions on how to create one can be found here.
To enable SpaceObServer to get authentication tokens from your Azure AD tenant, you have to register it in your Azure portal first and grant it permission to access Office 365 SharePoint Online:
Register SpaceObServer with your tenant
Please note that the following steps have to be done out of the scope of SpaceObServer. They may change with the ongoing development from Microsoft.
1.Sign in to the Azure portal.
2.Select on All services in the left-hand navigation, and choose App registrations (or use the search field in the top bar)
3.Select New application registration and create a registration with values like:
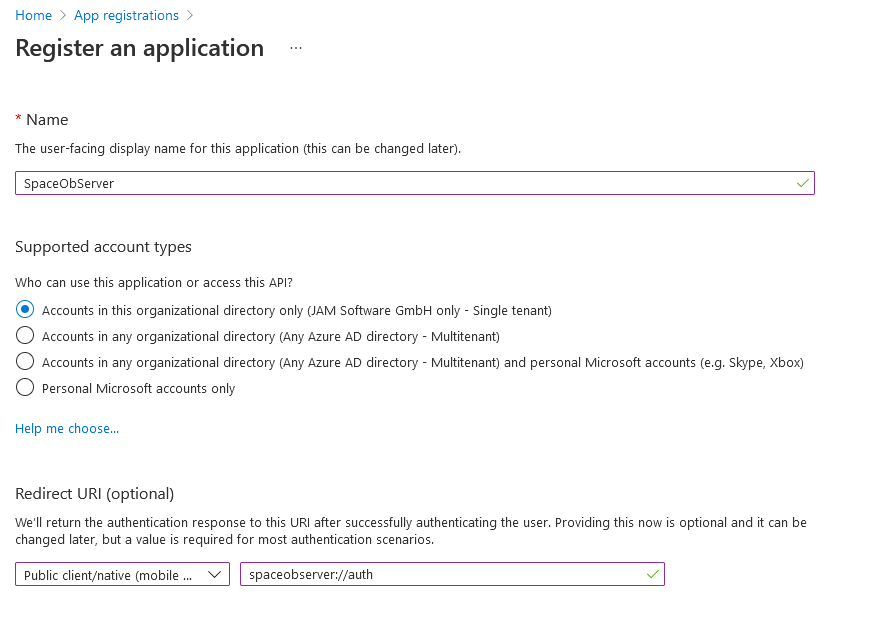
•Name: An application name of your choice to identify the registration in the Azure AD. We would propose to use SpaceObServer.
•Redirect URI: Sometimes reffered to as reply URL. Please select 'Public client/nativ' here.Because SpaceObServer uses MSAL for authentication, please either use the redirect URI provided for this purpose, or define your own according to the scheme "My URI"://auth, e.g. treesize://auth
4.Once the registration is completed, AAD will assign a unique Application ID to the app. Copy this value from the right pane, as it will be required for the next steps.
5.In the left navigation list and click Add Permission.
•Select SharePoint as the API
•Now add the Sites.Selected permission under Application Permissions. The shared site collections must be configured on your SharePoint beforehand. Please contact your SharePoint administrator for this purpose. You can find help regarding the configuration here.
•The permission might need to be approved by an administrator (grant admin consent).
6.In the left navigation list, select Certificates & Secrets. Here you can now add the *.cer file of your created certificate to the app registration. You can then use the *.pfx file to log in via SpaceObServer.
Provide SpaceObServer with the configuration information
In order to use the app registration made above, the information has to be provided to SpaceObServer.
To do this, please add the values for the Application ID and the Redirection URI via the options dialog under "System > Service".

Alternatively, If you are an administrator and want to configure these settings for a group within your company, you can define a group policy object to roll them out. Otherwise, the entries can also be added directly to the registration. :
1.Open the Group Policy Management Console, and navigate to the GPO you want to contain the configuration or create a new one. Open User Configuration > Settings > Windows-Settings > Registry.
2.Or open the registry editor by typing regedit in the search box on the taskbar.
3.Add the two entries:
1.For the Application ID:
•Hive: Use HKEY_LOCAL_MACHINE
•Path: Set to SOFTWARE\JAM Software\SpaceObServer
•Name: Set to AADApplicationID
•Value type: REG_SZ
•Value data: Enter the Application ID obtained from the AAD
2.For the Redirect URI:
•Hive: Use HKEY_LOCAL_MACHINE
•Path: Set to SOFTWARE\JAM Software\SpaceObServer
•Name: Set to AADRedirectURI
•Value type: REG_SZ
•Value data: Enter the Redirect URI configured with the AAD
Problems with authentication
•In case you encounter any issues with the authentication via certificate file, please ensure that the executing user of SpaceObServer as well as the SpaceObServer scan service has read access to the certificate file.