Disk Usage Comparison
For a detailed analysis of your disk space usage it may be helpful not only to see the current usage, but also its development over time.
TreeSize provides a powerful comparison mode enabling you to analyze size development over a period of time.
For that purpose, TreeSize compares data of the current scan with historical data. There are two different data sources available for the comparison:
Previously saved TreeSize scans (XML report)
Snapshots of the file system (available only for local NTFS drives)
Enabling comparison mode
To enable the comparison mode, please follow these steps:
Scan the path you want to view the size development for to get current results.
- Go to Scan > Compare with saved scan or Compare with snapshot.
If you selected “Compare with saved scan”, you may now choose the XML file of the previously saved scan.
If you selected “Compare with snapshot”, a dialog will open enabling you to choose a snapshot.
Select if you want to view size changes in the Directory Tree, in Views, or both.
By comparing a scan result with a previous scan, you can easily see which filers and folders were added and removed and analyze the space development in that time period.
This can help to identify files and folders that grow in size regularly and could eat up your space quickly if not handled at an early stage.
Comparison with a snapshot
TreeSize provides several different ways to compare your scans with each other. The easiest way to do this is the Snapshots feature.
To compare a disk space scan with a snapshot - Simply select a scan in the Directory Tree. - Now click the “Compare with snapshot” button on the “Scan” Ribbon tab. - You can also use the Application Menu (“File” > “Compare current scan” > “Compare with snapshot”).
The following dialog shows a list of the available Snapshots sorted according to their time-stamp.
It also shows the free space of each Snapshot, making it easy to spot exactly when the disk space on the hard drive where the current scan path resides on has increased or decreased.
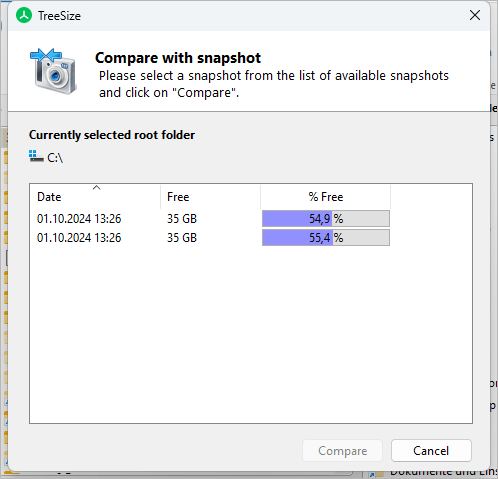
After selecting a Snapshot, click the “Compare” button to start the size comparison process.
Note
If this list is empty or an error message “No snapshots available for this scan” appears, there are two possible reasons for that:
Either no snapshots are existing
Not all necessary services are running on the destination system.
You can verify this by doing a right-click on the destination directory, open properties and select the “Previous Versions” tab.
If no snapshots are listed there, the program itself can also not list any entries. If you see entries there then not all required services have been running.
These services have now been started implicitly by opening the dialog and if you now execute “Compare with snapshot” again , you should see the correct results.
Comparison with saved scan
Scans results can be written into XML files at any given time, which provides a history of your disk usage.
These files can be stored away and reused in a later step for detailed analysis. You can use this information to compare your current scan results with the situation at any given time in the past.
To compare a disk space scan with a saved scan, select a scan in the Directory Tree and click the “Compare with saved scan” button on the “Scan” Ribbon tab.
You can also use the Application Menu (“File” > “Compare current scan” > “Compare with saved scan”).
The subsequent dialog allows you to select a previous scan that has been saved into an XML file.
Displaying the comparison
The result of the size comparison can be viewed in the “Directory Tree”, in the “Details” view, or in both at the same time.
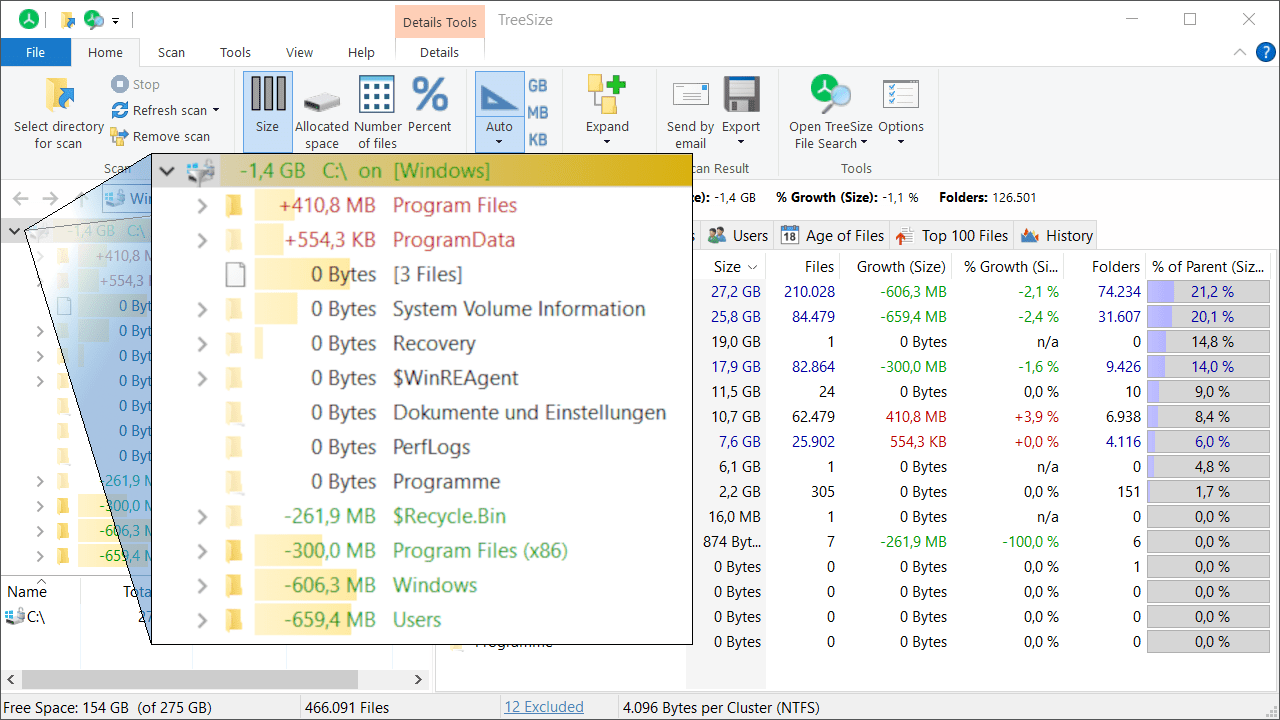
Elements that are highlighted in red have increased the disk space usage compared to the saved scan or snapshot, while a green element indicates that the disk space usage is now lower than in the saved state used for comparison.
You can choose whether you want to compare the size, the allocated space, or the number of files between the two scans by clicking the corresponding button in the “Home” Ribbon tab.